Transparency: This guide is based on real 2026 benchmarks. I may earn a commission if you purchase through the links below, at no extra cost to you.
Introduction
As a System Administrator, I’ve tested countless hosting providers. For critical projects—whether it’s a WordPress site, a Docker container, or a private cloud—you need a sweet spot: Enterprise Performance without the Enterprise Price Tag.
In my 2026 benchmarks, Vultr High Frequency (HF) consistently outperforms standard VPS options by delivering 3GHz+ clock speeds and NVMe storage.
In this guide, I will document my exact workflow for building a production-ready server from scratch. This setup is something I still use today because it minimizes maintenance time while staying secure.
This guide is written for developers, system administrators, and technical founders who want full control over their infrastructure.
🎁 Reader Offer: If you are new to Vultr, use the link below to get $300 in free credits to test this setup in your own environment. 👉 [Click here to Claim $300 Free Credit on Vultr(Limited Time)]
Step 1: The Domain Strategy (Privacy First)
Before touching the server, I always secure a domain. While many registrars offer cheap first-year prices, they often charge extra for privacy protection later (typically $10–$15/year).
I personally prefer NameSilo for one simple reason: Whois Privacy Protection is FREE forever. This keeps your personal address and phone number off public records and prevents spam.
- Action: Go to [NameSilo] and search for your domain.
- Tip: Their renewal rates are also among the lowest in the industry, so you won’t get a surprise bill next year.
Step 2: Deploying the Instance
Now, let’s launch the server.
- Log in to your [Vultr Dashboard] .
- Server Type: Select Cloud Compute -> High Frequency.
- Why HF? High Frequency instances are ideal for workloads that rely on single-core performance, such as WordPress, APIs, and automation tasks.
- Location: Pick a data center closest to your users (e.g., Tokyo or New York).
- OS Image: I stick with Ubuntu 22.04 LTS for stability.
- Plan: At the time of writing, the $6/month plan is powerful enough for 90% of starter projects.
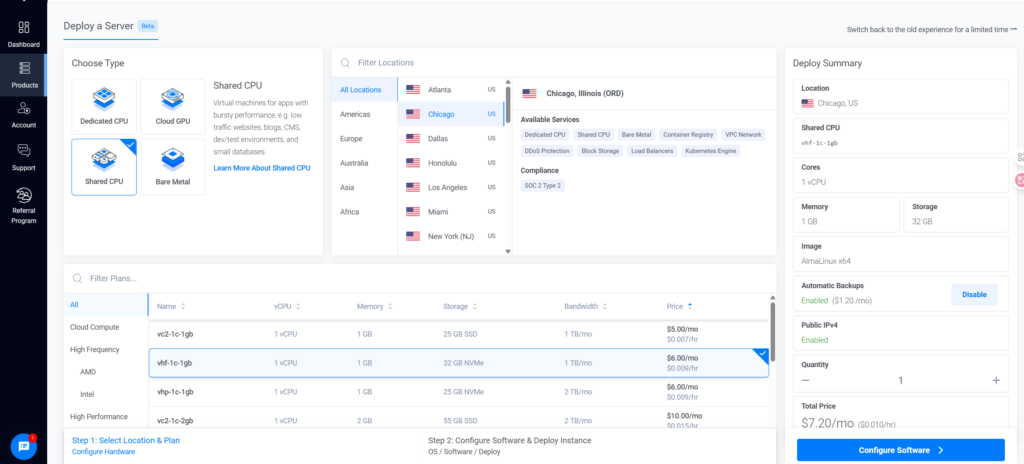
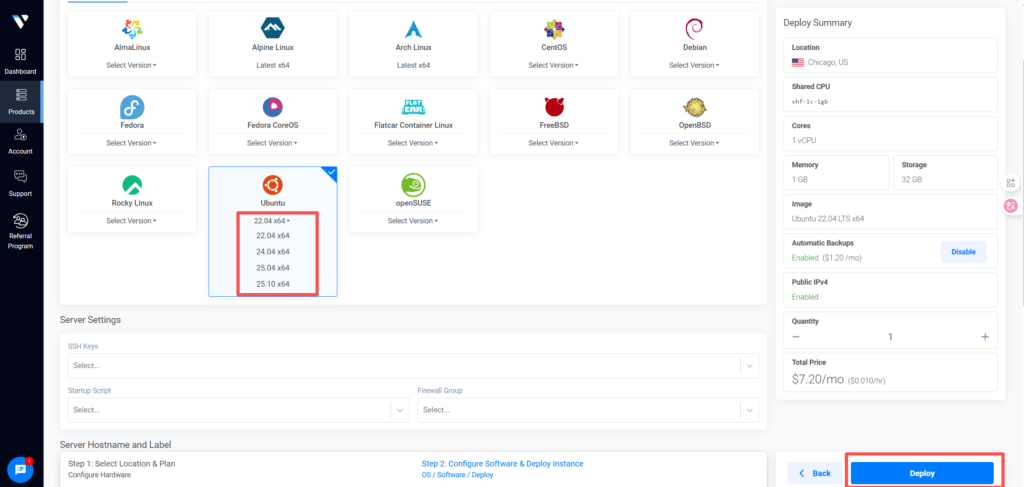
Click Deploy. Your server will be online in about 60 seconds.
Step 3: Secure Connection (Critical Step)
⚠️ Security Warning:
Never SSH into a server as root over public networks.Always use SSH keys, disable password authentication,and restrict access whenever possible.
As a best practice, I strictly control how my servers are accessed.When working remotely or on public Wi-Fi, I ensure my SSH traffic is encrypted and not directly exposed.
One optional approach is using a VPN or private tunnel.I personally use NordVPN, and its Meshnet feature can help reduce IP exposure when accessing remote Linux servers.
Recommendation: Ensure your connection is encrypted before handling root credentials. 👉 [Check out NordVPN features here]
Step 4: Environment Setup
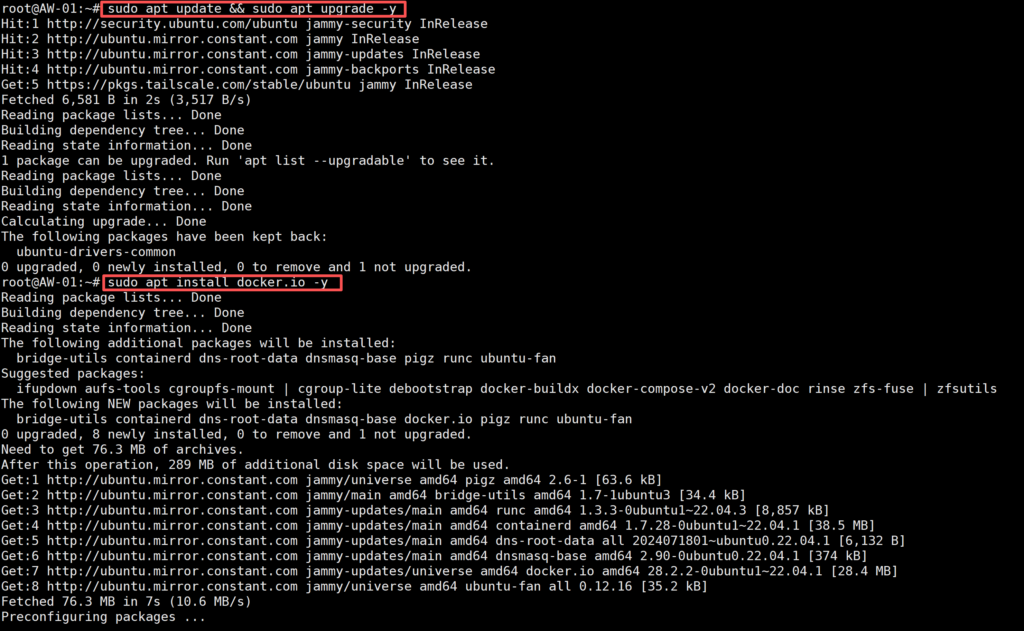
Once logged in via SSH, run the standard updates to ensure your security patches are current.
Bash
# Update package list
sudo apt update && sudo apt upgrade -y

# Install Docker (Example)
sudo apt install docker.io -y
At this stage, you have a clean, high-performance environment ready for any application.
Advanced Use Case: Scaling & Automation (Optional)
💡 Pro Tip for Developers & Data Engineers
If your project involves web scraping, SEO monitoring, or automation, using a single Data Center IP (like the one from Vultr) can lead to blocks from target websites.
For these specific scenarios, I use Residential Proxies to rotate IP addresses.
- One option I’ve used: [IPRoyal] (residential proxies)
- Why: For automation tasks that run intermittently, residential proxies are more practical than VPNs. I prefer providers with non-expiring traffic so I can scale jobs without worrying about unused bandwidth.
Conclusion
You now have a fully operational, high-performance server on Vultr, backed by a privacy-focused domain from NameSilo.
Summary of the Stack:
- Infrastructure: Vultr High Frequency (compute layer).
- OS & Access: Ubuntu 22.04 LTS + SSH key authentication.
- Domain & DNS: NameSilo (with free Whois privacy).
- Network Security: VPN or private tunnel (NordVPN is one option).
- Automation (Optional): Residential proxies for scaling tasks.
This workflow has proven reliable across personal projects,production services, and early-stage scalable systems.