As a system administrator managing multiple production servers, domain registration is something I deal with regularly.
Registering a domain name should be simple, transparent, and cheap. Unfortunately, the industry is full of traps.
Many popular registrars lure you in with a $0.99 first-year price, only to hit you with a $20+ renewal fee the next year. Worse, they often charge an extra $10–$15 per year just to keep your personal address and phone number private (WHOIS Privacy).
I don’t like hidden fees, and I definitely don’t like upsells.
That is why I exclusively use NameSilo for all my projects.
In this guide, I will show you exactly how to buy a domain with Forever Free Privacy Protection and how to point it to your VPS (like Vultr).
Why NameSilo? (The “No-BS” Reasons)
I switched to NameSilo years ago and haven’t looked back. Here is why:
- Forever Free WHOIS Privacy: This is the biggest selling point. NameSilo hides your personal data from spammers and scammers for free, forever. Other registrars treat this as a “luxury add-on.”
- Transparent Pricing: The price you see is the price you pay. Renewal rates are standard and don’t jump 300% after the first year.
- Security First: They offer free 2FA (Two-Factor Authentication) and Domain Defender protection to prevent unauthorized transfers.
Note: NameSilo’s interface is not as flashy as some consumer-focused registrars, but it prioritizes functionality over aggressive upsells. I prefer a clean dashboard over one that tries to sell me a website builder every time I log in.
Step 1: Search for Your Domain
First, head over to the NameSilo homepage.
👉 [Click here to check current domain prices on NameSilo]
Enter your desired domain name in the search box.
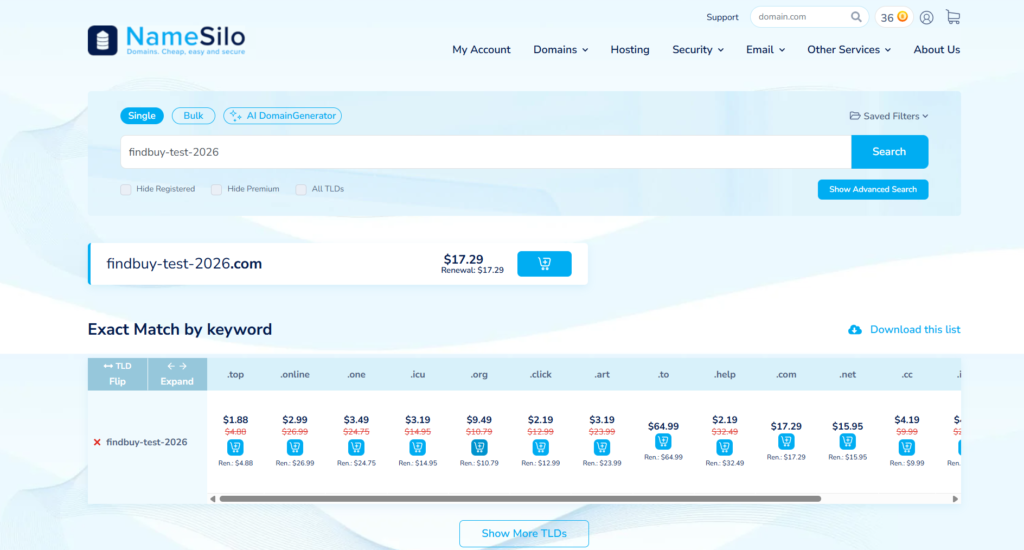
If your domain is available, click “Add” to put it in your cart.
Step 2: Configuration (Crucial Step)
This is where NameSilo shines. Once you proceed to the configuration page, pay attention to the “Privacy Setting”.
- WHOIS Privacy: Make sure this is set to “WHOIS Privacy” (It usually is by default).
- The Cost: Notice that it says FREE.
- Auto-Renew: I recommend leaving this ON so you don’t accidentally lose your domain next year.
You do not need to buy any extra upsells like “Premium DNS” or “Email Hosting” if you are just setting up a standard website or VPS.
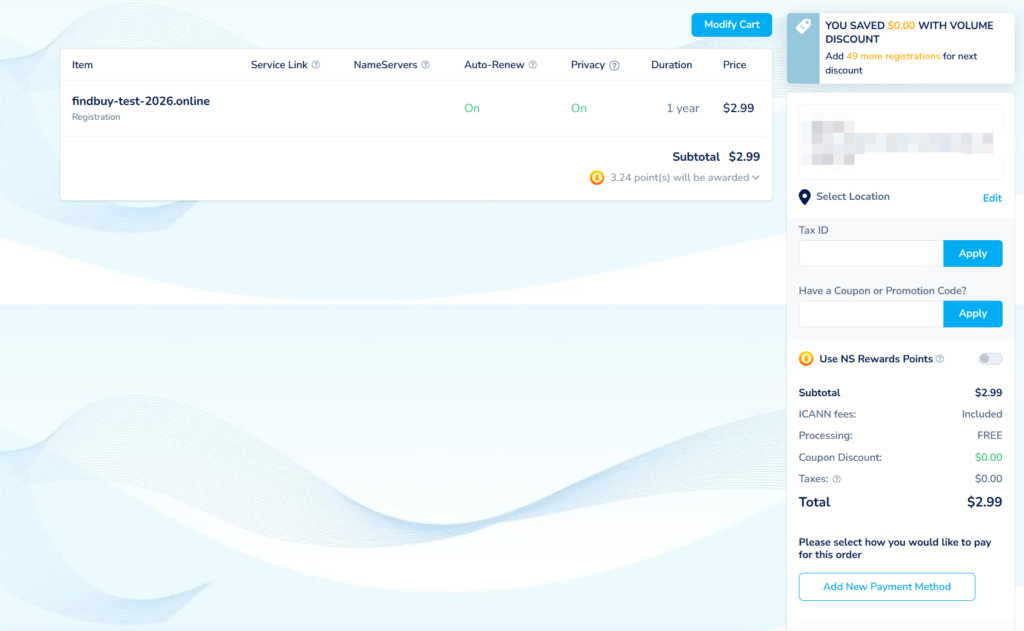
Step 3: Checkout
Review your cart. You will see that the final price is straightforward—no hidden “ICANN fees” added at the last second.
Create your account, pay via Credit Card, PayPal, or even Bitcoin, and you are done. The domain is now yours.
Step 4: Pointing the Domain to Your Server (DNS)
Owning the domain is just the first step. Now you need to connect it to your server (e.g., your Vultr VPS).
- Go to your Domain Manager in NameSilo.
- Click the blue Global (Earth) Icon next to your domain to manage DNS.
- Delete any default parking records.
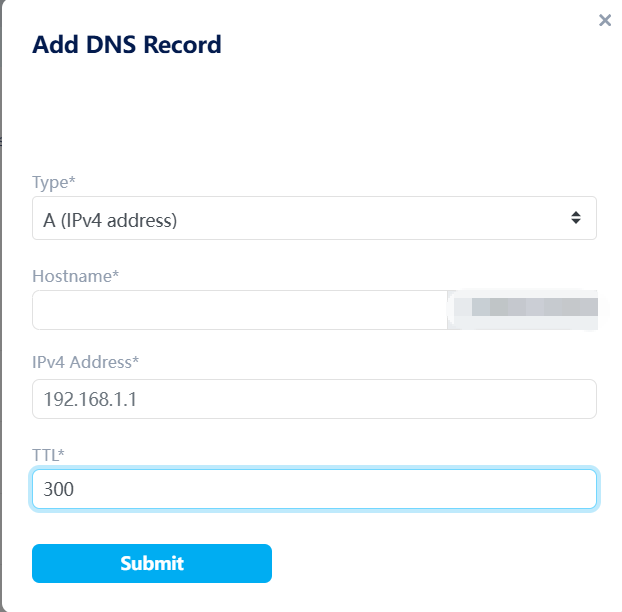
- Add a new “A Record”:
- Hostname:
@(or leave blank) - Address/Value:
[Insert Your Vultr Server IP Address Here] - TTL:
300(Recommended for initial setup so changes propagate faster)
Since we set the TTL to 300, the DNS should propagate globally in just a few minutes.
What’s Next?
A clean domain setup is only half the job. The next step is making sure your server is fast and secure.
If you haven’t deployed your high-performance server yet, check out my step-by-step guide below — this is the exact setup I use in production.
👉 [Next Step: How to Deploy and Secure a High-Performance Server on Vultr]